


Resources
Keep It Dry: Your Step-by-Step Guide to Waterproofing Basement Walls
Keep It Dry: Your Step-by-Step Guide to Waterproofing Basement Walls
Why Knowing How Do You Waterproof a Basement from the Inside Matters

To waterproof a basement from the inside, you must manage water rather than just try to block it. The most effective interior waterproofing system combines crack repair, masonry sealants, an interior French drain (drain tile), a high-capacity sump pump, and a vapor barrier.
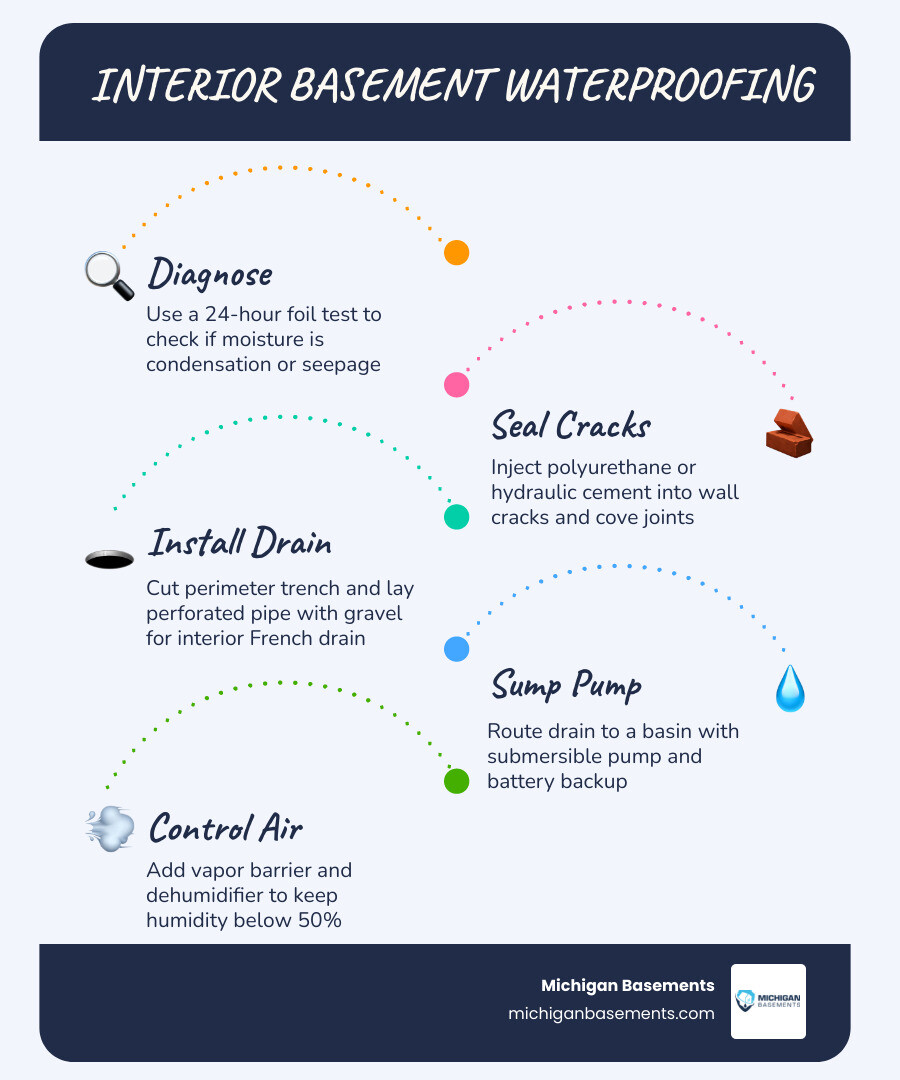
To keep your basement completely dry from the inside, follow this proven multi-step approach:
- Diagnose the Source: Use a simple 24-hour foil test to see if your wet walls are caused by indoor condensation or exterior soil seepage.
- Repair Cracks and Joints: Seal wall cracks with polyurethane injection or hydraulic cement, paying close attention to the cove joint where the floor meets the wall.
- Apply Masonry Sealants: Coat bare, unpainted concrete with a penetrating crystalline sealer to block capillary moisture wicking.
- Install an Interior French Drain: Cut a trench along the concrete floor perimeter and lay perforated drain pipes surrounded by clean gravel.
- Add a Sump Pump: Route the drain pipes to a perforated sump basin equipped with a high-capacity submersible pump and a battery backup system.
- Control Air Moisture: Install a heavy-duty vapor barrier on the walls and run a dehumidifier to keep humidity levels below 50%.
As the founder of Michigan Basements, I am Dominic Hesano. Our company specializes in professional basement waterproofing, crawl space encapsulation, and foundation repair services across Southeast Michigan. We help homeowners master how do you waterproof a basement from the inside to protect their families and preserve their home’s structural integrity. My team and I believe in straightforward, honest diagnostics with zero high-pressure sales, ensuring your home gets the exact solution it needs.
Why Water Enters Your Home: The Science of Below-Grade Moisture
To truly solve a wet basement issue, we have to look at the science of what is happening behind your drywall. Your basement is essentially a concrete box sitting in a giant hole in the ground. Because concrete is naturally porous, it acts like a dense sponge, wicking up moisture from the surrounding earth.
Three primary physical forces work together to drive water into your basement:
- Hydrostatic Pressure: This is the heavyweight champion of basement leaks. When heavy rain or spring snowmelt saturates the clay soils common in Metro Detroit, the ground can hold only so much water. A cubic foot of water weighs 62.4 pounds. When thousands of gallons of water pool against your foundation, they create immense lateral pressure. This hydrostatic pressure forces water through microscopic concrete pores, hairline cracks, and structural joints.
- Capillary Action: Even without intense pressure, concrete draws in water through capillary action. Think of how a paper towel draws up liquid when you touch the corner to a spill. Moisture from damp earth travels upward and inward through the concrete, evaporating on the inside and causing high humidity.
- Condensation: Often mistaken for a foundation leak, Basement Condensation Issues happen when warm, humid air meets cold, below-grade concrete walls.
The most notorious entry point for liquid water is the “cove joint”—the non-structural seam where your poured concrete basement floor meets your foundation walls. If you have ever wondered, “My Basement Leaks Where Wall Meets Floor – Why?“, the cove joint is your answer. Because this joint is never completely fused, it is the path of least resistance for water driven by hydrostatic pressure. Understanding this helps you see why you must Don’t Let It Seep: Understanding Your Leaky Basement Cove Joint before finishing your space.
Leaving these moisture pathways unaddressed does more than ruin your storage boxes. Thanks to the “stack effect,” warm air rising through your home acts like a chimney, pulling up to 50% of its air directly from your basement. This means mold spores, high humidity, and musty odors from downstairs end up in your main living spaces.
According to the Environmental Protection Agency (EPA), mold can begin growing on wet surfaces within 24 to 48 hours. A damp basement is a direct threat to your home’s structure and your family’s health, which is why understanding the connection between a Damp Basement and Your Health is so critical.
Interior vs. Exterior: When Is Interior Waterproofing Enough?
When deciding how to tackle your wet basement, you will quickly find two main schools of thought: interior and exterior waterproofing.
- Exterior waterproofing stops water before it ever touches your foundation. It requires heavy excavation around the outside of your home to expose the foundation walls, clean them, apply a thick polymer membrane, and install a footing drain.
- Interior waterproofing focuses on managing and redirecting the water once it reaches the foundation, channeling it safely away using sub-slab drainage systems and sump pumps.
Choosing between the two is a diagnostic decision, not just a financial one. Let’s look at how they compare:
| Feature | Interior Waterproofing | Exterior Waterproofing |
|---|---|---|
| Primary Goal | Water management and pressure relief | Water prevention and barrier protection |
| Typical Cost | $3,000 – $8,000 (Interior drainage) | $5,000 – $15,000+ (Due to excavation) |
| Disruption | Minor; localized inside the basement | Major; disrupts landscaping, decks, and driveways |
| Best For | Cove joint leaks, floor seepage, high water tables | Bowing walls, structural cracks, failed exterior membranes |
| Lifespan | 25 – 30+ years (with maintained sump pump) | Lifetime of the home (if high-quality membrane used) |
In Southeast Michigan, our heavy clay soils create what engineers call the “bathtub effect.” Rainwater collects in the loose backfill soil right against your foundation wall because the surrounding undisturbed clay does not drain easily.
If your foundation walls are structurally sound (no bowing or severe horizontal cracks), an interior drainage system is highly effective. It relieves the hydrostatic pressure building up in that “bathtub” by giving the water a controlled pathway to escape.
However, if your foundation walls are bowing inward by more than an inch, or if you have severe structural cracking, interior work alone cannot fix the underlying issue. In those rare scenarios, you must explore How to Waterproof a Basement from the Outside to stabilize the structure. For a deeper dive into making this decision, check out this guide on Interior vs Exterior Waterproofing: Which Do You Need?.
How Do You Waterproof a Basement from the Inside? The Core Methods
When looking at how do you waterproof a basement from the inside, you will find several different methods. These range from quick DIY surface coatings to comprehensive, professionally installed drainage systems.
1. Waterproof Paint and Coatings
Waterproof paint is the least expensive way to waterproof a basement, costing between $1 and $6 per square foot. These coatings are applied directly to bare concrete walls. While they can block minor dampness, they are a temporary measure. They cannot withstand significant hydrostatic pressure and will eventually bubble, peel, and fail if water is actively pushing through the wall.
2. Penetrating Sealants
These are liquid sealants (often silicate- or siliconate-based) that soak into the concrete. Silicate and epoxy sealants can cost up to $5 to $7 per square foot. They react chemically with the concrete to form solid crystalline structures inside the pores, effectively blocking capillary action. These are excellent for dry-feeling but dusty or slightly damp concrete walls.
3. Vapor Barriers and Wall Membranes
A heavy-duty plastic vapor barrier or dimpled membrane is attached to the basement walls to catch any water that seeps through. Instead of letting the water damage your drywall or framing, the membrane channels the water down the wall and directly into an interior drainage system.
4. Interior French Drains (Drain Tile Systems)
This is the gold standard of interior water management. We jackhammer the perimeter of the concrete floor, dig a trench next to the footing, lay a perforated drain pipe wrapped in clean gravel, and cover it back up with concrete. This system relieves hydrostatic pressure by giving groundwater a zero-resistance path to flow into. You can read more about what this entails in our article on What is Basement Waterproofing?.
5. Sump Pumps
An interior drain tile system cannot push water out of your house on its own. It relies entirely on a connected sump pump. The drain tiles channel water into a sump basin, where a heavy-duty submersible pump discharges the water safely away from your home. This is the heart of your water management system. To understand how these systems protect your home, explore What Is a Sump Pump? and What Is a French Drain?.
For a complete overview of these interior systems, you can also refer to the Interior Basement Waterproofing: Complete Guide – GrahmsGuide.
Step-by-Step Guide: Your DIY and Professional Roadmap
Whether you plan to tackle minor dampness over a weekend or hire a team to install a full drainage system, waterproofing requires a systematic approach.
Step-by-Step Guide: How Do You Waterproof a Basement from the Inside?
To successfully waterproof your basement walls from the inside, follow these essential steps:
Step 1: Diagnose the Source (The Foil Test)
Before buying any products, run a 24-hour aluminum foil test. Tape a 12-inch square of aluminum foil tightly to a bare concrete wall using duct tape on all four sides. After 24 to 48 hours, peel it off:
- If the room-facing side of the foil is wet, your problem is indoor condensation. You need a dehumidifier.
- If the wall-facing side of the foil is wet, water is actively seeping through the concrete from the outside. You need waterproofing.
Step 2: Surface Preparation
Waterproofing products will not stick to dirty, painted, or dusty walls. You must scrape off any old paint, dirt, and loose concrete using a wire brush or scraper.
If you see a white, powdery substance on your walls, that is efflorescence—salt deposits left behind when water evaporates. Clean this off completely using a 10:1 water-to-muriatic acid solution, wearing proper safety gear. Rinse thoroughly and let the walls dry.
Step 3: Repair Cracks and Joints
Never apply waterproof paint or sealants over active cracks. Use hydraulic cement for non-structural hairline cracks, as it expands as it cures to tightly seal the gap. For a comprehensive guide on DIY prep work, check out How to Waterproof Basement Walls: A Step-by-Step DIY Guide.
Step 4: Apply the Waterproofing Product
Using a heavy-duty nylon masonry brush or a thick-nap roller (at least 3/4 inch), apply your chosen crystalline sealer or waterproof paint. Work the product deep into the pores of the concrete. Apply a second coat after the first has dried according to the manufacturer’s instructions.
If you are dealing with active seepage rather than minor dampness, surface sealants alone will not solve the problem. You will need to learn How to Stop Water from Seeping Through Basement Walls and How to Seal a Wet Basement using professional methods. For a high-level overview of wall-specific applications, see How to Waterproof a Basement Wall.
How to Fix Structural Cracks and Cove Joint Seepage
If your concrete walls have cracks wider than 1/8 inch, or if water is actively bubbling up through the floor-wall joint, simple paints will not cut it.
- For Wall Cracks: We use professional-grade polyurethane or epoxy injection kits. We mount injection ports along the crack, seal the surface of the crack with an epoxy paste, and then inject liquid polyurethane into the ports. The polyurethane expands to fill the entire depth of the crack all the way to the outside soil, remaining flexible so it does not crack again as the foundation shifts. Learn more about this process in our guide on How to Fix a Cracked Basement Wall.
- For Cove Joint Seepage: Because water is pushed up by hydrostatic pressure under the slab, the only permanent fix is installing a sub-slab drainage system. Trying to seal the cove joint shut with concrete or caulk will only force the water to find another way out, often causing it to bubble up through floor cracks. To address this, read How to Fix Water Coming Through Basement Floor.
Lifespan, Costs, and Maintenance of Interior Systems
Waterproofing is an investment in your home’s structural integrity and future resale value. According to the National Association of Realtors, finishing a basement returns roughly 70% of your investment at resale, but waterproofing is a non-negotiable prerequisite before you hang a single sheet of drywall.
What Does It Cost?
- DIY Interior Waterproofing (Paint/Sealants): $200 – $1,500. Perfect for addressing minor condensation or light wall dampness.
- Professional Interior Drainage System (French Drain & Sump Pump): $3,000 – $8,000. This is the standard for managing hydrostatic pressure and cove joint leaks.
- Professional Exterior Waterproofing: $5,000 – $15,000+. Required when there is severe structural damage or when you want to protect the foundation from the outside.
For a detailed cost breakdown tailored to your home, check out How Much Does It Cost to Waterproof a Basement?.
How Long Does It Last?
The lifespan of your waterproofing depends entirely on the method you choose:
- Waterproof Paint: 5 to 10 years before it begins to peel and requires reapplication.
- Penetrating Sealers: 10 to 15 years.
- Crystalline Coatings: Considered permanent because they fuse with the concrete.
- Interior Drain Tile Systems: 25 to 30+ years, often lasting the lifetime of the home.
To learn more about what to expect over the years, see How Long Does Basement Waterproofing Last? and the Complete Basement Waterproofing Guide: How to Stop Leaks and Protect Your Foundation | 2026.
Crucial Maintenance: Sump Pump Battery Backups
If you rely on an interior drainage system, your sump pump is your lifeline. But what happens during a severe summer storm when the power goes out? Without power, your sump pump stops, and your basement can flood in minutes.
A high-quality battery backup system is non-negotiable. A good backup system can run your pump intermittently for 7 to 10 hours, keeping your basement dry until the power returns. Remember to test your pump annually by pouring a bucket of water into the pit, and replace your backup batteries every 2 to 3 years.
Frequently Asked Questions About Interior Basement Waterproofing
What are the common signs that my basement needs interior waterproofing?
According to industry data, over 60% of basements in the United States experience water intrusion. The primary signs that your basement requires interior waterproofing include:
- Efflorescence: White, chalky mineral deposits left on concrete walls after water evaporates.
- Musty Odors: Distinct damp smells caused by active mold and mildew growth.
- Peeling Paint or Wallpaper: Moisture behind finished walls pushing the coatings off.
- Damp Carpet or Flooring: Water wicking up through concrete floor cracks.
- Rust Stains: Corrosion on the bottom of metal appliances, nails, or drywall tacks.
How Do You Waterproof a Basement from the Inside on a Budget?
To waterproof a basement from the inside on a budget, implement these low-cost water management strategies:
- Clean Your Gutters: Prevent clogged gutters from overflowing and pouring water directly next to your foundation.
- Extend Your Downspouts: Ensure downspouts discharge water at least 4 to 6 feet away from your foundation.
- Regrade Your Yard: Ensure the soil around your home slopes away from the foundation at least 6 inches over the first 10 feet.
- Control Indoor Humidity: Run a high-capacity dehumidifier to keep basement humidity levels below 50% to prevent condensation. For tips on managing humidity, read our guide on How to Lower Humidity in a Basement.
When should I hire a professional instead of attempting DIY interior waterproofing?
While DIY projects are suitable for minor wall dampness, you should hire a professional waterproofing contractor like Michigan Basements if you experience:
- Active Flooding: Standing water pooling on the floor or flowing through walls.
- Structural Cracks: Cracks wider than 1/4 inch, stair-step cracks in block walls, or bowing walls.
- Cove Joint Seepage: Water consistently leaking where the wall meets the floor.
- Inexperience with Heavy Equipment: Installing an interior French drain tile system requires concrete jackhammering and precise grading, which can risk structural damage if done incorrectly.
For homeowners in Southeast Michigan (including Macomb, Oakland, and Wayne Counties), Michigan Basements provides expert, professional-grade interior waterproofing solutions. Before starting, read about Why You Should Avoid DIY Basement Waterproofing to protect your home’s foundation.
Conclusion
Waterproofing a basement from the inside is all about managing hydrostatic pressure and keeping moisture away from your living space. While basic DIY steps can handle minor dampness and condensation, active leaks and cove joint seepage require a heavy-duty, engineered solution.
Michigan Basements is the leading provider of professional foundation and moisture control solutions in Michigan. Our core services include:
- Basement Waterproofing: Interior and exterior drainage systems, sump pump installations, and crack repairs.
- Crawl Space Encapsulation: Vapor barrier installation, dehumidification, and structural stabilization.
- Foundation Repair: Structural crack injection, bowing wall stabilization, and piering.
We proudly serve homeowners across Southeast Michigan, including:
- Macomb County
- Oakland County
- Wayne County
- Detroit Metropolitan Area
As a family-owned business, we pride ourselves on clean workmanship, customer involvement, and providing honest, no-cost inspections. If you are ready to secure your home’s foundation and enjoy a dry, healthy basement, contact us today to schedule your free inspection. Let us help you keep your home dry for years to come.
Explore our professional Basement Waterproofing Repair services today!
 Get instant pricing!