


Resources
Easy Ways to Repair and Waterproof a Leaking Window Well

Stop a Leaking Window Well Before It Floods Your Basement
To fix a leaking window well, start outside: remove leaves and soil, clear the drain, restore clean washed gravel, and move roof and surface water away from the foundation. Then reseal gaps at the window well flange or window frame with a flexible masonry-rated polyurethane sealant. If water rises in the well during storms, drainage and grading are usually the main problem – not interior caulk.
A window well is meant to hold back soil and let light and emergency access reach a below-grade window. But when its drain clogs, gutters overflow, or soil slopes toward the house, it can act like a bucket beside your basement window. The trapped water creates hydrostatic pressure that can force moisture through small gaps in the frame, foundation, or well connection.
Most minor repairs are manageable for a homeowner. Persistent flooding, cracked concrete, a failed perimeter drain, or water entering below the window may need a professional inspection before the damage spreads.
I am Dominic Hesano, founder of Michigan Basements. As basement waterproofing, foundation repair, and window well drainage specialists serving homeowners across Southeast Michigan—including Oakland County, Macomb County, Wayne County, and Metro Detroit—we have spent years diagnosing wet basements, flooded window wells, and foundation drainage problems. In the sections ahead, I will explain how to fix leaking window well problems by finding the real water source first, then correcting drainage, seals, and exterior runoff.

Fix leaking window well vocabulary:
Diagnosing Why Basement Window Wells Leak and Flood
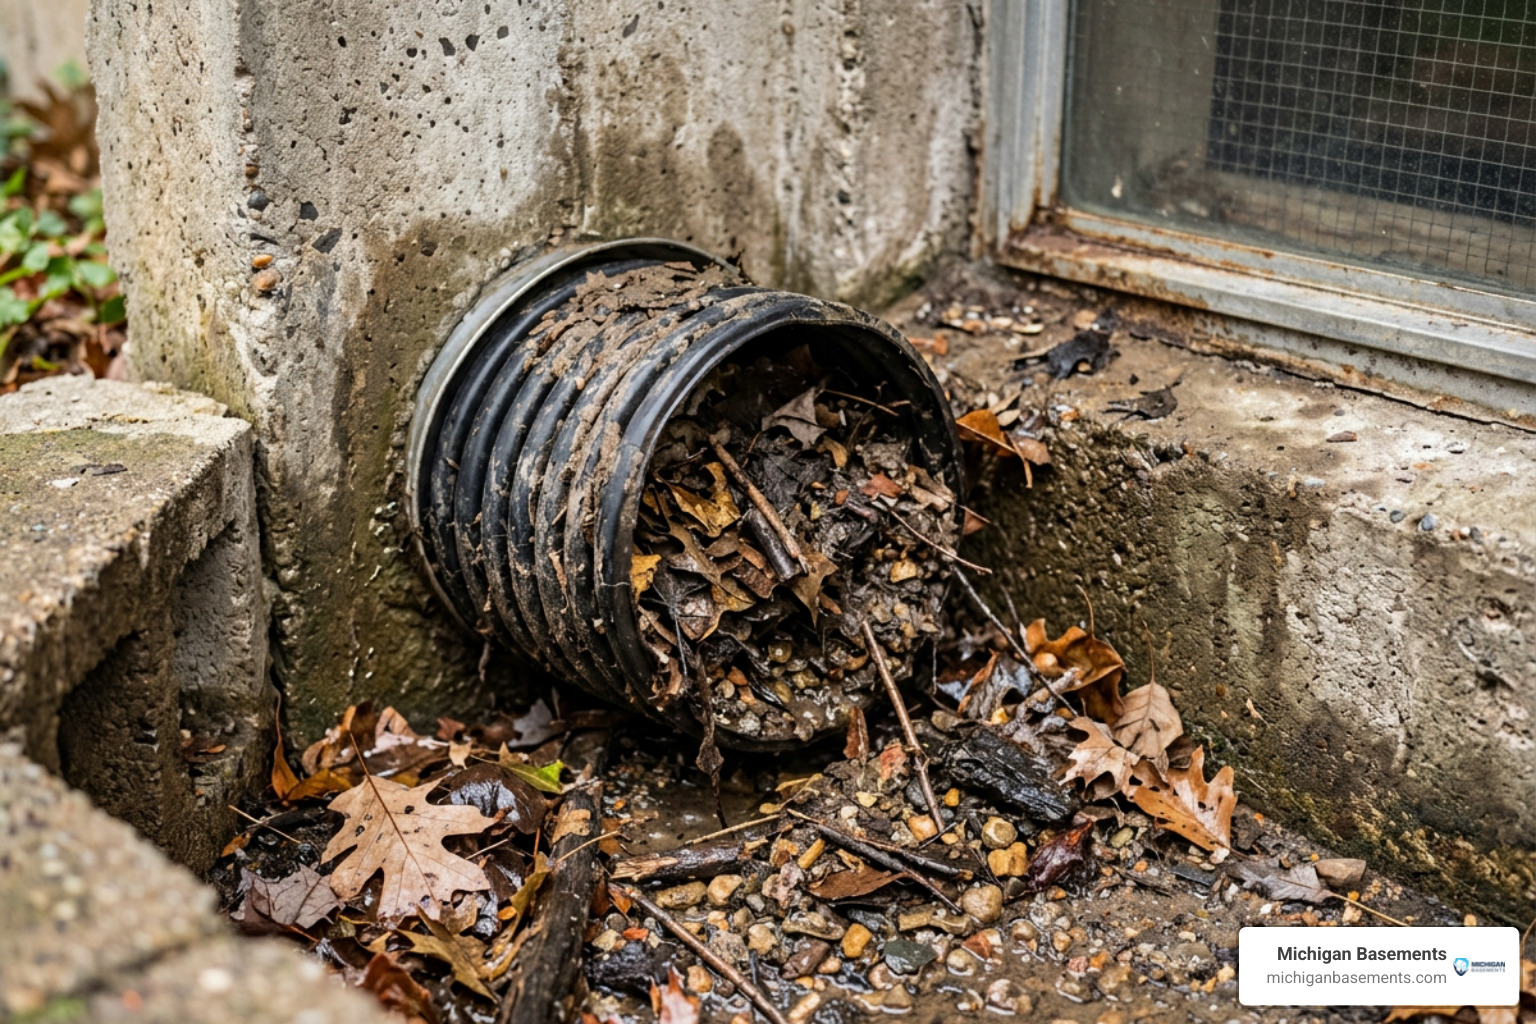
Basement window wells are essential architectural features designed to retain earth, let natural daylight brighten sub-grade living spaces, and serve as safe egress exits. However, when external conditions go wrong, a window well transforms into a small containment pool resting directly against your home. Nearly all basements experience some form of moisture intrusion over their lifetime, and window openings represent one of the most frequent entry points.
Understanding why water pools in the first place requires looking at surface runoff and drainage mechanisms. When heavy rains hit, roof gutters can overflow directly above the window opening. If downspouts discharge within a couple of feet of the foundation, hundreds of gallons of water saturate the backfilled soil immediately adjacent to the well.
If you notice water leaking into basement after a heavy rain, the culprit is often a blocked vertical drain pipe, loose soil settlement around the window well perimeter, or an unsealed flange. Debris such as autumn leaves, landscape mulch, and windblown sediment sift through unshielded gravel beds, creating an impermeable mud barrier that traps water against your foundation wall.
Drainage Failure vs Seal Deterioration
To choose the right corrective action, you must distinguish between a drainage system failure and the deterioration of the window frame’s mechanical seal.
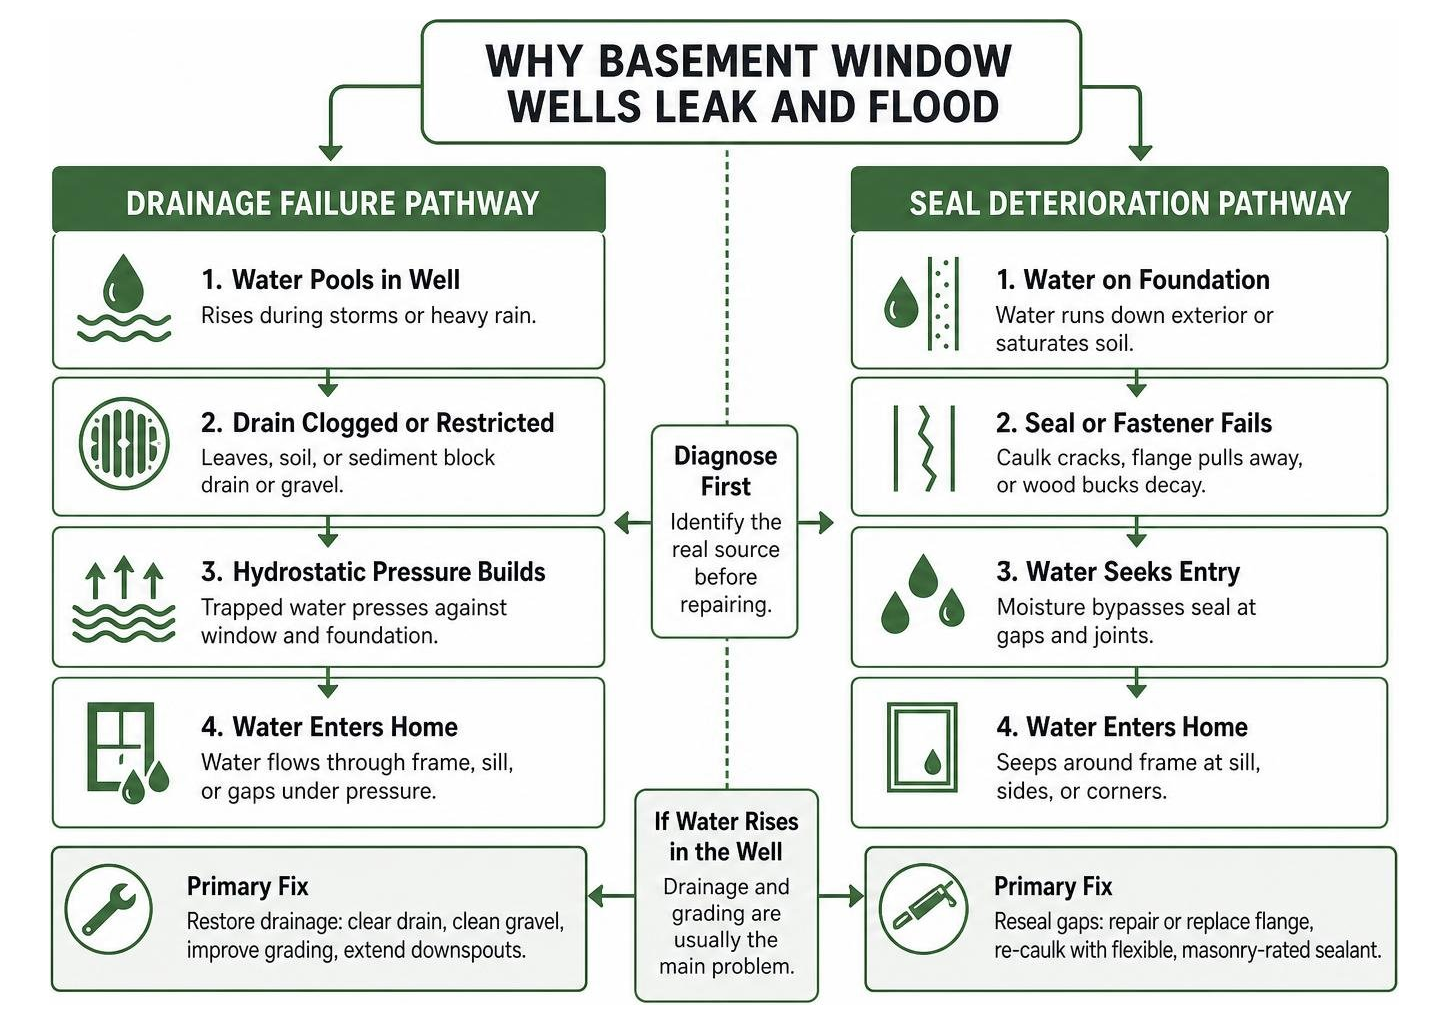
- Drainage System Failure: Characterized by water pooling visibly inside the window well basin. Water levels rise until they submerge the window sill, causing liquid to cascade through the sliding sash or pour through the window frame assembly. This indicates that the gravel bed is completely choked with fine silt or the weeping tile connection beneath the well is blocked or severed.
- Seal Deterioration: Occurs when water seeps around the concrete-to-frame boundary even when the gravel bed appears relatively dry. Over time, wood bucks decay, builder-grade caulking hardens and cracks, and the fasteners securing the steel or composite well flange pull away from the concrete. This allows subsurface water flowing down the foundation wall to bypass the window perimeter entirely.
The Role of Hydrostatic Pressure and Soil Saturation
Hydrostatic pressure is the lateral and upward force exerted by standing water against underground structures. When the loose backfill surrounding your basement window well becomes fully saturated, the water table locally elevates.
Because backfill soil is less dense and more porous than undisturbed surrounding earth, it acts as a collection trench. In areas with dense clay soil, expanding wet earth traps subsurface runoff against the foundation. Hydrostatic pressure quickly builds, exceeding 0.5 psi per vertical foot of water depth. This hydraulic force searches for any minor flaw, pushing moisture straight through concrete cold joints, tie-rod holes, and window buck perimeters. When dealing with foundational water problems, learning how to fix basement water leak issues starts with relieving this exterior pressure rather than trying to trap water behind indoor walls.
Step-by-Step Guide to Fix Leaking Window Well Drainage and Seals
Fixing an active window well leak requires a systematic approach combining mechanical clearing, aggregate restoration, high-performance sealing, and positive surface drainage.
| Sealant Feature | Polyurethane Elastomeric Sealant | 100% Silicone Sealant |
|---|---|---|
| Best Application | Well flange-to-concrete & masonry joints | Window sash, glass, and vinyl-to-buck seams |
| Masonry Adhesion | Superior structural bonding to porous concrete | Moderate adhesion; can pull away over time |
| Flexibility / Elasticity | High movement capability under freeze-thaw | Excellent flexibility, lower abrasion resistance |
| Paintability | Fully paintable once cured | Non-paintable |
| Service Life | 15–20+ years in exterior underground contact | 10–15 years |
How to Fix Leaking Window Well Drains and Gravel Beds
Modern window wells built within the last 20 years typically feature a dedicated 4-inch vertical perforated drain pipe connecting directly to the exterior footing drain or indoor sump pump basin. Follow these steps to restore its functionality:
- Excavate the Basin: Shovel out all contaminated, mud-clogged rock, organic debris, and standing sludge until you expose the vertical drain opening and reach bare earth below the window sill.
- Clear the Drain Pipe: Insert a manual plumbing snake or feed a high-pressure garden hose nozzle down the vertical drain tile. Break up any compacted silt plugs, root intrusions, or mud caps until water flows freely into your perimeter drainage system.
- Line the Well Base: Lay a layer of heavy-duty woven geotextile filter fabric across the bare soil base, wrapping the top of the vertical drain pipe opening with a protective mesh cap to stop future sediment intrusion.
- Backfill with Washed Aggregate: Fill the basin with clean, washed 3/4-inch angular crushed stone or river gravel. A proper repair requires at least 12 inches of clean, washed 3/4-inch gravel (with a minimum base layer of 6–8 inches maintained permanently) to provide adequate void space for high-volume storm runoff, keeping the aggregate surface at least 4 to 6 inches below the bottom of the window frame.
For additional insight on foundational drainage approaches, see this detailed resource on masonry sealing and gravel restoration.
Sealing Foundation Gaps and Window Buck Enclosures
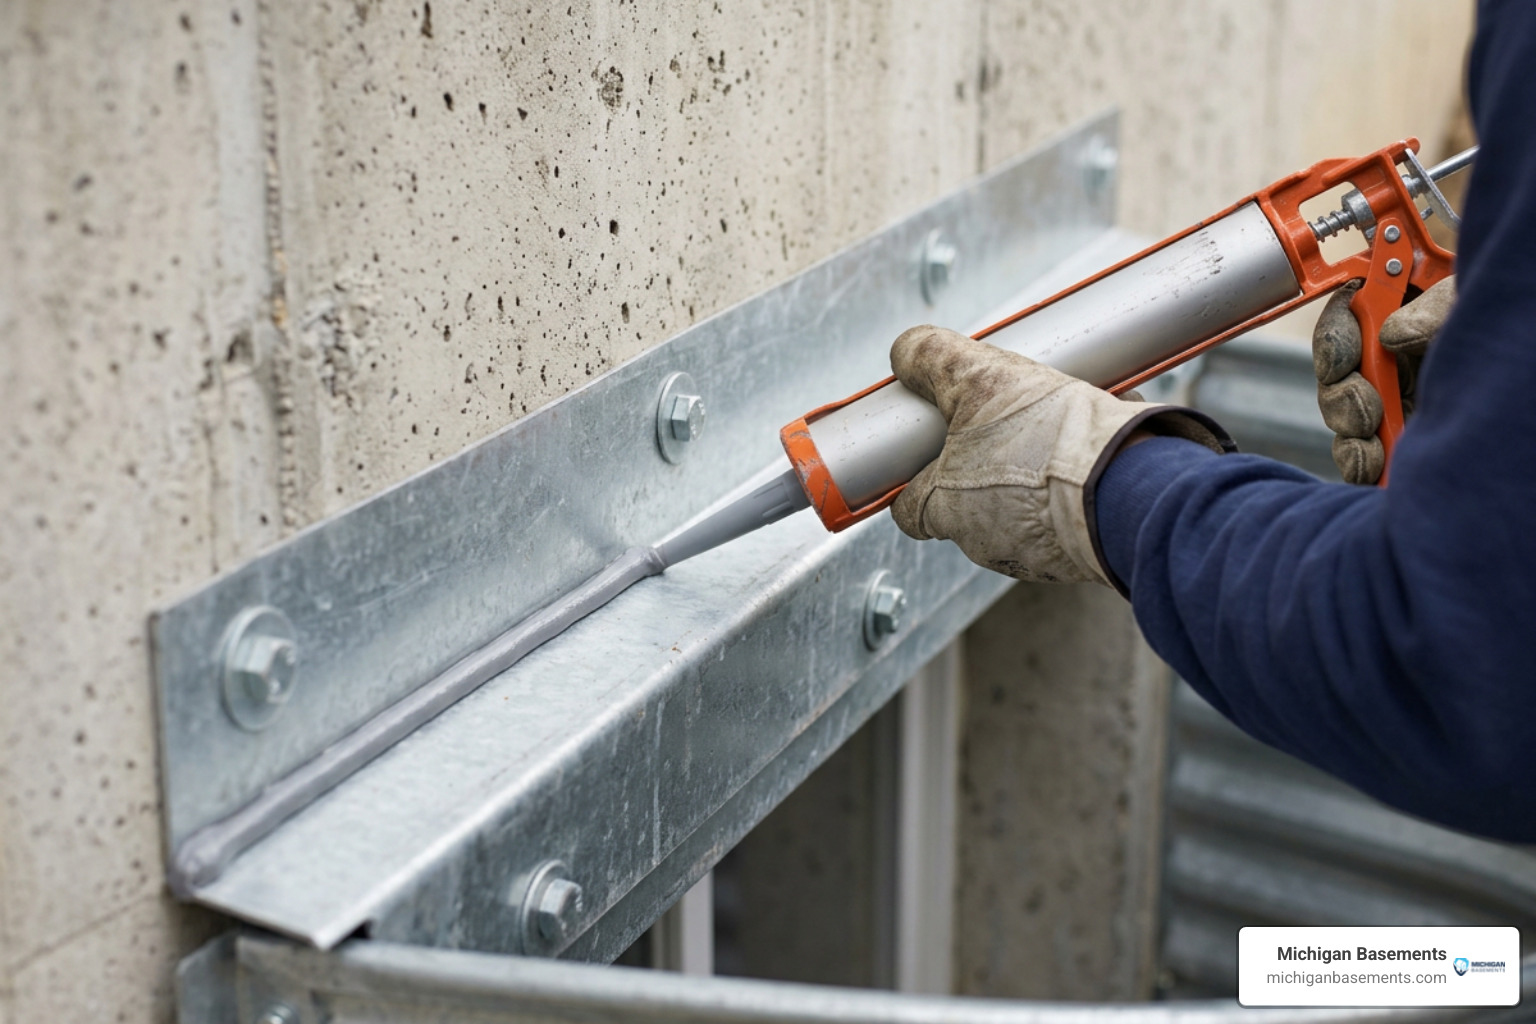
- Surface Preparation: Using a stiff wire brush and a masonry chisel, thoroughly scrape the exterior concrete wall along the outer edge of the window well flange and around the window buck. Remove old, brittle caulking, peeling paint, loose mortar, and biological growth. Clean the joint with denatured alcohol or acetone and allow it to dry completely.
- Fill Concrete Cracks: If you spot hairline fissures or structural cracks spreading outward from the window corners, inject them with hydraulic cement or low-viscosity polyurethane expanding foam to stop water from seeping through basement walls.
- Anchor the Well Flange: Ensure the window well is tightly mechanically fastened to the masonry foundation. Drive 3/8-inch concrete masonry sleeve anchors spaced roughly 12 inches apart along both vertical flanges.
- Apply Polyurethane Elastomeric Sealant: Load a commercial-grade polyurethane elastomeric caulk into a high-thrust caulking gun. Apply a solid, continuous 3/8-inch bead along the exterior seam where the steel or composite well flange meets the concrete wall. Tool the bead with a curved trowel or gloved finger to ensure an airtight, watertight bond.
- Waterproof the Window Buck: Apply a clean bead of silicone or exterior-grade polymer sealant along the joint where the window frame joins the wood or vinyl rough buck.
Exterior Soil Regrading and Downspout Extensions
Even the cleanest gravel bed will fail if surface water continuously drains straight into the window well. Diverting bulk water away from the foundation perimeter is essential.
- Calculate the 5% Slope: Soil should drop at least 6 inches in elevation over the first 10 horizontal feet away from the basement wall. Use dense, clay-based fill dirt to build up this pitch, compacting it firmly in 2-inch lifts to prevent future settling.
- Maintain Well Clearance: The top rim of the window well flange should extend 2 to 3 inches above the finished surrounding soil grade. This prevents cascading surface sheet runoff from flowing over the rim during downpours.
- Extend Downspouts: A single gutter downspout can discharge hundreds of gallons of water in an hour during a storm. Route downspout terminations so that water discharges at least 3 to 5 feet (and ideally 10 feet) away from any window well. Use solid PVC extensions or heavy-duty splash blocks. For chronic yard drainage issues, consider installing an exterior channel; you can reference our exterior French drain guide for complete slope and trench specifications.
Protective Upgrades and Preventative Maintenance
After restoring the drainage and structural seals, installing protective hardware ensures long-term basement safety.
Choosing the Right Well Cover for Emergency Egress
A durable, sloped window well cover stops leaves, lawn clippings, snow, and driving rain from overwhelming the gravel reservoir while still letting natural light illuminate the basement.
- Material Selection: Choose heavy-duty, UV-stabilized clear polycarbonate over brittle acrylic. Polycarbonate withstands heavy snow loads, falling hail, and accidental foot traffic without shattering or yellowing.
- Building Code Compliance: For habitable basement bedrooms, the International Residential Code (IRC section R310.2.3) requires egress window wells to have a minimum horizontal area of 9 square feet, with a minimum net clear projection and width of 36 inches.
- Ladder Requirements: If the well depth exceeds 44 inches below the exterior ground surface, an egress ladder or permanently attached steps must be installed. The cover must open fully from the inside without requiring tools, keys, or special knowledge. For complete dimensional guidelines, consult standard IRC egress code standards.
Professional Strategies to Fix Leaking Window Well Structural Issues
When DIY surface steps are not enough to stop water infiltration, advanced structural waterproofing is necessary:
- Sump Pump Tie-Ins: In older homes lacking exterior drain tile, a waterproofing contractor can core-drill a dedicated PVC line through the foundation below the window sill, routing well runoff directly to an internal drain tile and sump basin.
- Exterior Waterproofing Membranes: Excavating the earth outside down to the foundation footing allows technicians to apply seamless elastomeric rubber membranes and dimpled drainage boards. Homeowners looking to waterproof a basement from the outside can effectively stop all lateral hydrostatic seepage before water ever touches the window frame.
- Drywell Installation: For properties where gravity-drained perimeter weeping tile is unreachable, excavating a separate deep drywell packed with aggregate creates a discharge basin that diverts surge water safely below the frost line.
Frequently Asked Questions About How to Fix a Leaking Window Well
Can I fix a window well leak from the inside?
No. Attempting to seal a window well leak exclusively from the interior by applying caulk, hydraulic cement, or waterproof paint against the inside window frame is rarely effective. Interior seals do not stop external hydrostatic pressure. Water will simply pool behind the trim, rotting the window buck, generating hidden toxic mold, and finding alternative cracks to enter your basement living space. Water must be intercepted and managed on the outside.
How much gravel should be in the bottom of a window well?
A window well requires a minimum of 6 to 8 inches of gravel, with 12 to 18 inches of clean, washed 3/4-inch crushed aggregate recommended for optimal drainage capacity. This gravel provides essential void space for water storage during peak rain events while preventing soil and garden mulch from washing into the vertical drain pipe. Always leave 4 to 6 inches of clearance between the top of the gravel bed and the bottom of your window sill.
Why does my window well only fill with water during heavy rain?
Window wells fill during heavy rain because the rate of water entry exceeds the discharge capacity of the underlying drain pipe or gravel bed. This issue is often caused by roof downspouts dumping concentrated rainwater directly alongside the foundation, soil sloping toward the house, or a buried vertical drain tile clogged with silt and organic debris that cannot handle peak rainfall volume.
Conclusion
Fixing a leaking window well requires addressing surface water diversion, structural seal integrity, and subterranean drainage capacity. Clearing clogged drain pipes, renewing washed gravel beds, applying high-grade polyurethane sealants, and maintaining proper soil grade will keep your basement bright, dry, and structurally sound through every seasonal storm.
A typical DIY window well installation or repair runs between $150 and $600 in materials. However, if your window well continues to fill with water, if foundation walls show extensive cracking, or if you require an upgraded drainage tie-in, professional intervention is the safest route.
At Michigan Basements, we provide expert professional basement waterproofing and repair services across Southeast Michigan, Metro Detroit, Oakland County, Macomb County, and Wayne County. We offer no-cost inspections and clear, honest solutions to protect your home. You can also explore our online pricing tool to estimate project costs directly on our website.
 Get instant pricing!